Adjustable Dog's Splint
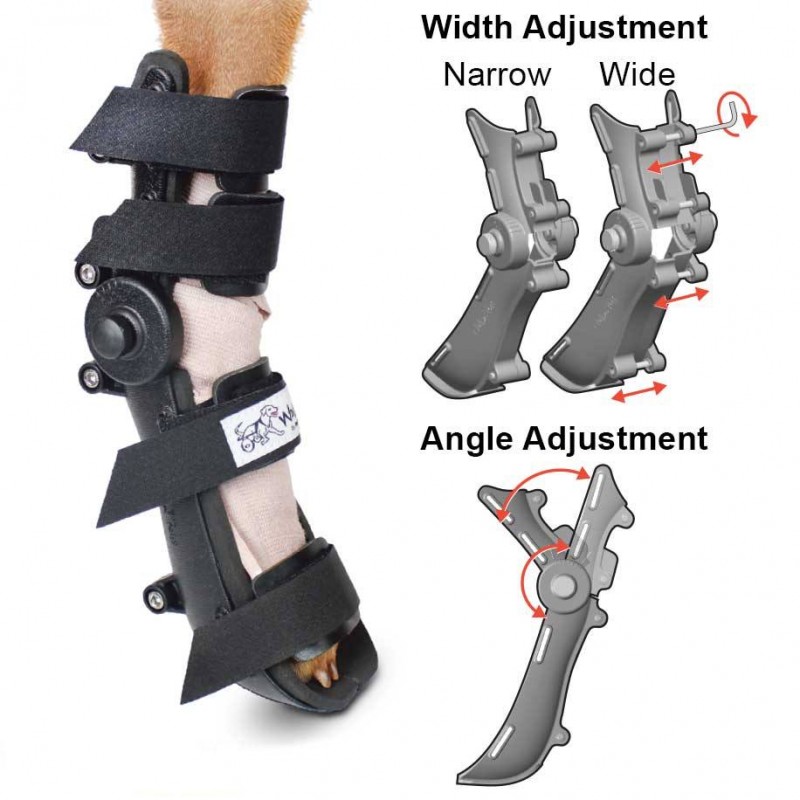
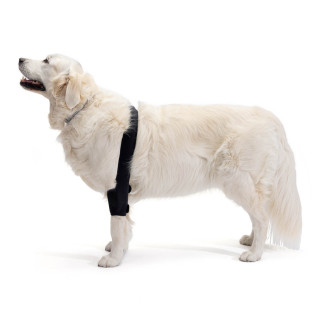
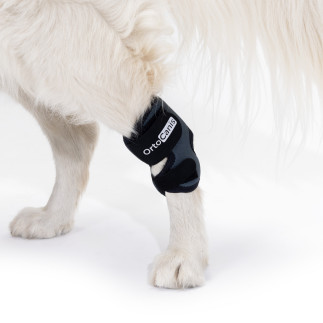
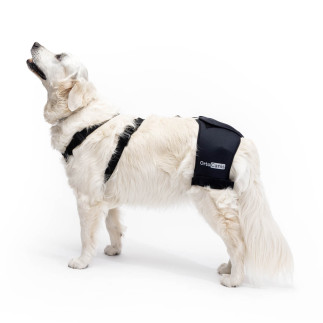
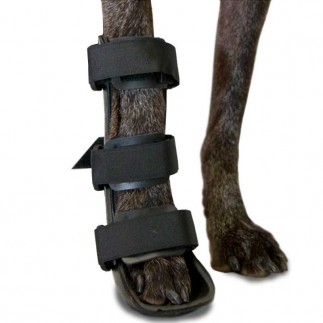
This adjustable Splint for dogs helps to brace injuries to the lower rear or front legs. With its patented adjustable fit and unique design, the Adjustable Splint provides complete lower leg stability with customized fit and support, allowing for multi-patient use. This dog's splint helps stabilize joints for arthritis or injuries and helps promote healing during physical therapy and recovery.
Easy to Wear: Simply place paw in the splint with his nails at the edge, and then buckle in place using fastener straps. New and Improved Design: New lighter, more durable design is double the strength of the original and eliminates fatigue at high-stress points.
- Designed to be used on patients for either the Front or Rear Legs.
- Splint width expands to accommodate a bandaged foot or leg.
- Adjustable splint allows for a more custom fit.
- Adjustable angle will keep pet’s leg comfortable and in a normal walking position.
- Provides full, lower leg support and stabilizes hock or carpal joints and under the paw.
- Splint allows weight-bearing on a broken or weak limb.
- Customizable splint fit provides convenience for daily wound therapy.
- Lightweight and adjustable design increases the pet’s tolerance of splint.
Quality Construction
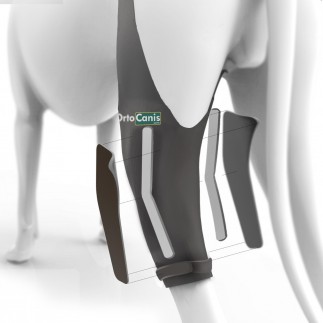
- Constructed of lightweight, durable plastic.
- Cushioned inner foam lining for comfortable everyday wear.
- Adjustable touch fastener straps for easy-on/easy-off use.
- Rubber non-skid pad for traction.
- Easily adjust splint width and angle for the perfect fit.
- Lighter, stronger splint design is rugged enough for even the most active dog.
- Available in five different sizes to accommodate pets of all builds.
When to use the Adjustable dog splint
Rear Leg Conditions:
- Osteoarthritis of the Tarsal or Metatarsal joints
- Degenerative Joint Disease (DJD)
- Polyarthritis
- Soft Tissue injuries to Tarsal or Metatarsal Tendons/Ligaments
- Achilles Tendon Injury
- Tarsal or Metatarsal joint instabilities or malformations
- Post-Surgical protection
- Medical Management of Tarsal or Metatarsal injuries and treatment
- Neurological conditions causing knuckling
- Wound management aide
Front Leg Conditions:
- Soft Tissue injuries to Carpal or Metacarpal tendons/ligaments
- Osteoarthritis of the Carpal or Metacarpal joints
- Hyperextension injuries
- Polyarthritis
- Carpal or Metacarpal joint instabilities or malformations
- Brachial Plexus or Radial Nerve damage injuries
- Neurological conditions causing knuckling of paw
- Degenerative joint disease
- Post-surgical protection
- Wound management aide
-How to choose the right size?
The Adjustable Splints come in a range of sizes to fit your dog. The sizes range from X-Small to X-Large to make sure most breeds are covered. All splints come with the ability to adjust angle and width. Adjustable straps also add to this splint’s ability to fit multiple dogs. Splints will not be effective if they are too loose or too tight. Foam insert is designed to fit at splint’s widest adjustments, if adjusted to a narrower setting foam lining may be trimmed to fit.
Please keep in mind that the Adjustable Dog Splints are designed to support the lower part of the rear OR front leg.
IMPORTANT: Please reference the appropriate sizing guide when measuring your dog. The sizing recommendations may vary based on FRONT or REAR leg intended usage
If you have a cat and are interested in these splints, you will need to order the X Small.
It is recommended that you measure the dog in a standing position, if possible.
For most FRONT leg use, the splint angle is set on the second notch at a 10-degree angle.
For most REAR leg use, the splint should be set on the middle notch or 30-degree angle, unless otherwise recommended by your Veterinarian.
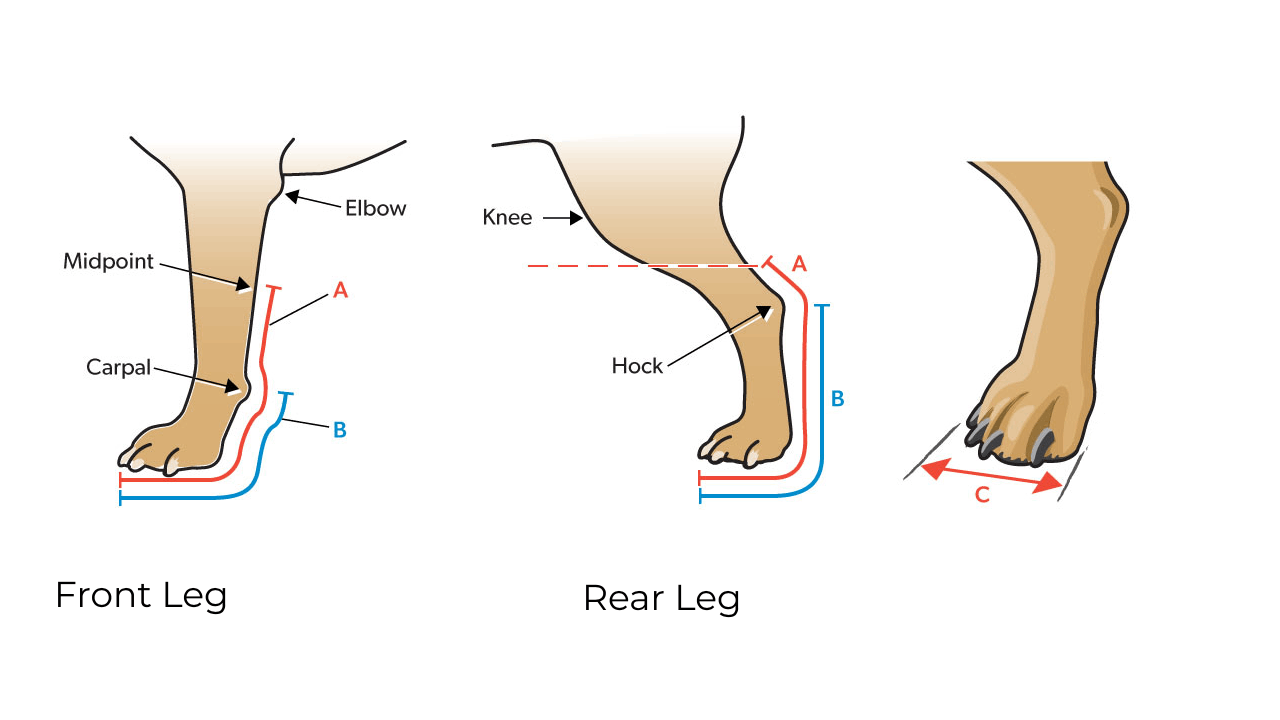
Rear splint usage sizing guide
A: Measure from end of longest toenail to midpoint between hock and knee.
B: Measure from the end of longest toenail to top of hock.
Front splint usage sizing guide
A: Measure from end of longest toenail to midpoint between carpal joint (wrist) and elbow.
B: Measure from the end of longest toenail to center of carpal joint (wrist).
| Size | A | B | C |
| X Small | 6.8″ | 4.8″ | 1 - 1.4'' |
| Small | 8.8″ | 6″ | 1.25 - 1.75'' |
| Medium | 10.4″ | 7.25″ | 1.5 - 2'' |
| Large | 12.5″ | 8.75″ | 1.75 - 2.5'' |
| X Large | 14.25″ | 10″ | 2.25 - 3.25'' |
How to fit the Adjustable Splint to your dog
The Adjustable Dog Splint provides you the ability to change the joint angle and width of the splint. It’s important to remember the first adjustment made MUST be the angle.
Step One: Undo all Velcro straps so you can easily test fit the splint as you go along. It’s best to Velcro the straps to themselves off to one side.
Step Two: Slightly loosen both black knobs on either side of the splint to adjust the angle. The splint adjusts in 10-degree increments. Most pet’s natural REAR hock angle will likely be on the middle notch, marked 30 degrees, which is about 135 degrees. Most pet’s natural FRONT carpal joint angle will likely be on the second notch marked 10-degree angle, which is about 170 to 180 degrees. Again, every pet’s confirmation will vary. Set the splint joint angle to best fit your pet’s natural stance referencing the non-splint leg if needed. Retighten the black knobs to secure once the angle has been adjusted.
Step Three: Test fit the splint to check angle and width.
Step Four: If you need to widen the splint, follow instructions. If the splint width does not need to be adjusted, proceed to step six.
Step Five: To widen the splint, you want to make small, even adjustments on each screw starting from the top and work your way down the splint so it widens evenly. Use the Allen key provided to do so. Loosen each screw slightly, the splint will widen the more you loosen the screws.
Step Six: Test fit splint on your pet until the width is right. Once required width is set, hold splint at new width while you slightly tighten screws to secure.
Step Seven: Now that your splint is all set and adjusted for your pet, you can secure straps.
Step Eight: Place leg in splint. Starting at the bottom with the paw, Velcro all straps to secure splint on the leg. Check for any areas of rubbing or incorrect fit. The leg should fit snugly in the splint without rubbing or areas of skin hanging over or pinched in the splint. If you’re now ready to go, reference the usage tab for instructions on how to slowly get your pet moving in the splint. If you’re having trouble fitting the splint, please contact one of our customer service representatives
Any splint placed on a pet’s foot will need to be removed at bedtime and should be removed for at least an hour during the day to allow the foot to breathe. Please note: There is no “right” or “left” leg or paw designated for splints; splints may be used for either the right or left leg/paw.
How to introduce a splint to your dog
It’s important to remember that any splint placed on a pet’s foot will need to be removed at bedtime, and should be removed for at least an hour during the day to allow the foot to breathe.
When introducing a new splint to a pet, it’s important to start slowly. Positive reinforcement methods, using praise, treats, or toys should always be used in association with the splint. The splint will initially make the pet walk “funny” or maybe not want to walk at all. Using positive reinforcement to encourage walking is always the best approach.
Day One: Place splint on pet for 10-15 minutes at a time, then remove. Try these short sessions 3 to 4 times during Day One. Once the splint is removed, look for any areas of irritation or rubbing on the pet’s skin that may have been caused by the splint. If you notice an area of rubbing, please consult one of our customer service representatives for fitting assistance and your Veterinarian with any medical concerns. It’s more important to make sure the pet is comfortable with the splint and the fit is correct tan to rush the process. Continue with these short sessions until your dog adjusts. If you are concerned that the fit isn’t correct, please contact our customer service department or consult with your Veterinarian.
Day Two: If your pet is having a hard time adjusting to wearing the splint, continue with the short 10-15 minute sessions, as described in Day One. If your pet seems to be walking a little better and is getting used to the splint, then it’s time to increase the session length a bit.
Place splint on for 15-30 minutes at a time, then remove. Try these sessions 3 to 4 times during Day Two. Again, look for any signs of discomfort, and respond accordingly.
Day Three: If your pet is still having a hard time, continue with the short 10-15 minute sessions, as described in Day One. If the pet seems to be walking a little better than in Day Two and is getting used to the splint, then it’s time to increase session length again.
Place splint on for 30-60 minutes at a time, then remove. Try these sessions 3 to 4 times during Day Three. Once again, look for any signs of discomfort, and respond accordingly.
Ongoing: Once the pet is able to comfortably wear the splint for 4 hours or more in the day, and no areas of rubbing or irritation are present, it’s all right to increase wear time to almost a full day, if needed. If you are unsure how long the splint should be worn based on your dog’s medical condition, it’s always best to consult with your Veterinarian.
Professional’s Guide to the Adjustable Dog Splint
The Walkin’ Fit Adjustable Splint is designed to provide a comfortable, custom fit while providing stability and support to the Tarsal or Carpal joints. Custom-made splints can be expensive and take weeks to be made. Our adjustable splint may be used on the front or rear legs. Our splint will allow you to fit patients on the spot. This splint’s width and angle can be adjusted as you progress through a treatment plan to maintain a proper fit for the patient. Allowing enough width to account for swelling or bandages while providing joint stabilization.
Advantages of an Adjustable Splint over a normal splint in a clinical setting:
- May be used on Tarsal or Carpal joints.
- Patient specific anatomic considerations – “posty” or “low” conformation.
- Can re-establish ROM slowly.
- Useful for Tibiotarsal instability/Collateral ligament injuries – Either medically managed or in recovery/early mobilization phase postoperatively.
- CCT mechanism injury assistance.
- Adjustable width accommodates bandaged limbs.
The Adjustable Dog Splint can be carried in hospitals and sold directly to clients for quick treatment.
Specific References
- ean13
- 879041008371
Adjustable dog splint
This adjustable Splint for dogs helps to brace injuries to the lower rear or front legs. With its patented adjustable fit and unique design, the Adjustable Splint provides complete lower leg stability with customized fit and support, allowing for multi-patient use. This dog's splint helps stabilize joints for arthritis or injuries and helps promote healing during physical therapy and recovery.
Scroll down in the description to see how to select the size and visit our FAQ section for any other questions about its uses, instructions, shipping, payment methods, returns or exchanges.


